


In this article, I will be going through the process of Laravel application deployment, namely to Google Cloud Platform (GCP). This article will cover the basics of GCP as a Cloud Service Provider, the steps of setting up a new Virtual Machine via the Google Cloud Console and deploying your application onto it.
Google Cloud Platform introduction
First, let's talk about what the GCP is and what it offers. Google Cloud Platform is a cloud service provider run by Google and is very similar to other cloud service providers like AWS or Oracle Cloud Infrastructure. It offers services like the Compute Engine where you can deploy virtual machines, various tiers of Cloud Storage which offers AWS S3-like storage buckets, variety of serverless solutions and so on. GCP also offers a generous free tier, with $300 in free credits you may use in your first 3 months on any service, as well as forever free services beyond this trial period. These include for example 1 VM (F-1 micro only in US datacenters), 5GB of Cloud Storage or Firebase functionality (up to monthly limits). You can read more about the free tier here.
To get started with the GCP, you'll need a Google account. You will also need to register an account with the GCP. The registration process is fairly easy and includes filling various information about yourself, such as billing information, as you might be accustomed to when setting up an account with any Cloud Service Provider.
Creating a Virtual Machine
To spin up a new Virtual Machine, head over to the Cloud Console, then to Compute Engine and select Create Instance. For deploying any PHP application to the cloud (be it Laravel, Symfony or any framework-independent application), I tend to use the Bitnami LAMP cloud images which can, fortunately, be found on AWS, GCP and Azure marketplaces. I have very good experience with these images, as they tend to be secure and have everything you'd need for hosting a PHP web application already preinstalled. You can find out more about these here.
In the Create Instance dialog, several image options pop up on the left-hand side of the screen. We'll go to Marketplace and search for LAMP Certified by Bitnami image. A listing for LAMP Certified by Bitnami should appear. Upon clicking the listed image, you'll be redirected to the image's description screen. Once there, click Launch, this takes you back to the Virtual Machine configuration screen as seen below.
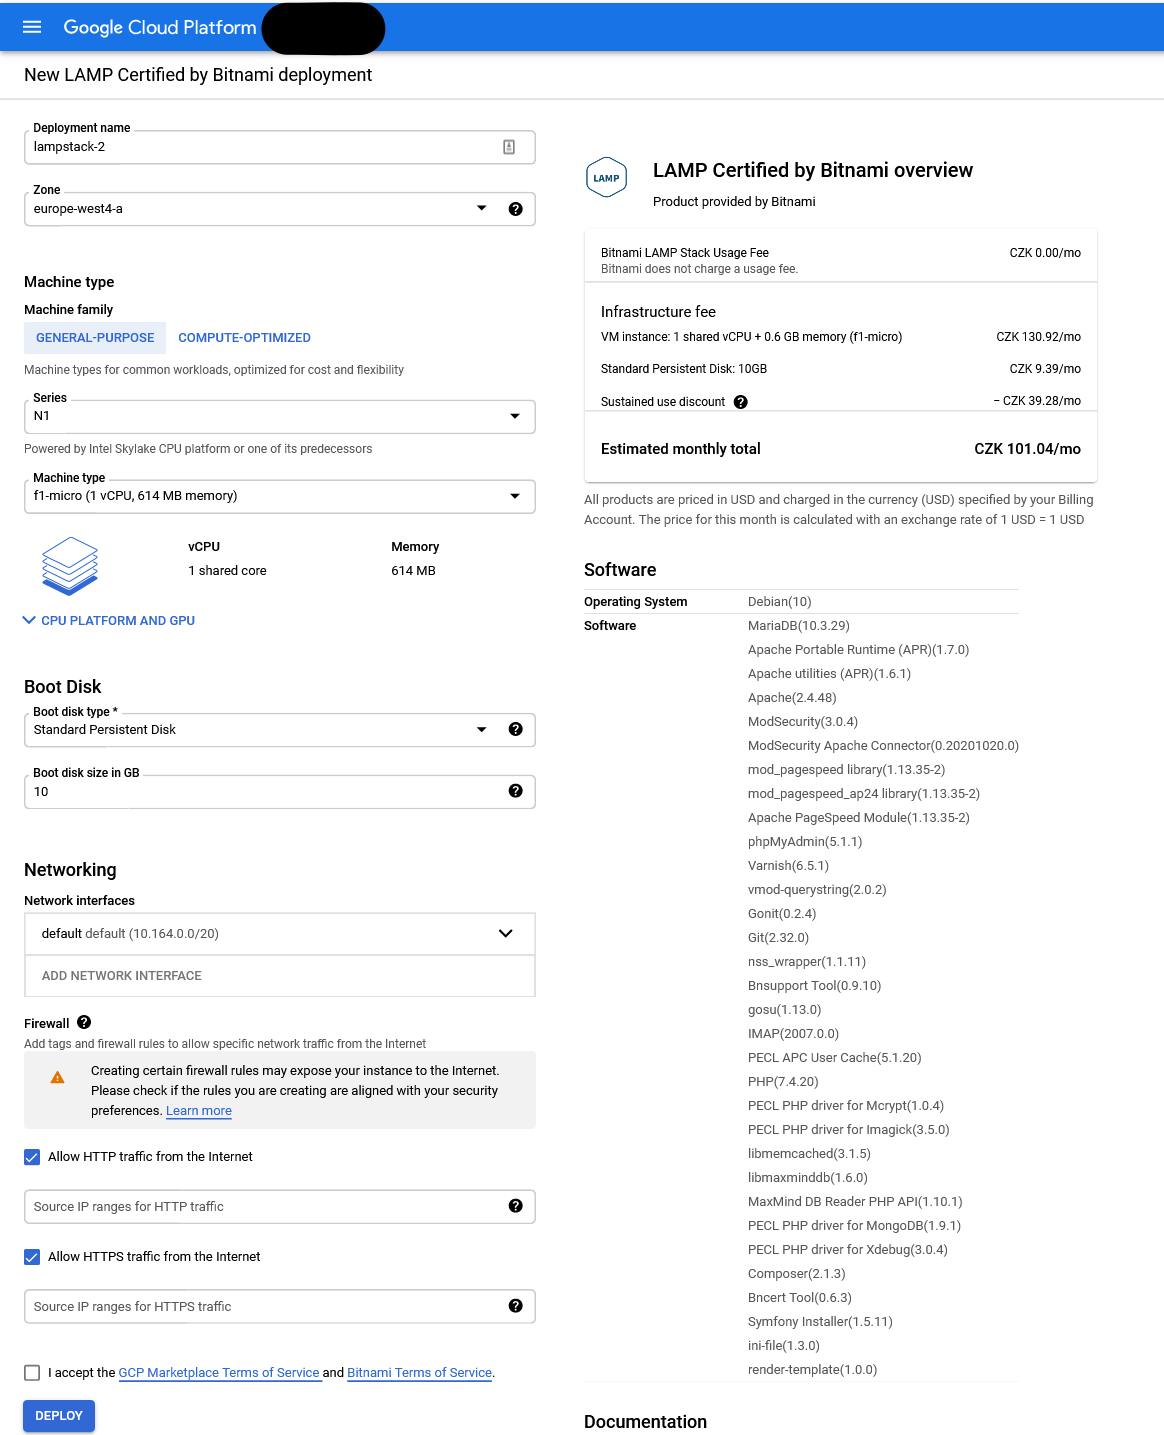
You may set machine parameters here, the main ones to focus on are the Deployment Zone, Machine Type and Disk Size. As you can see in the screenshot above, I've chosen the F-1 micro type as it is powerful enough for the purpose of this showcase, if you're running a larger application, be sure to check machine types with more RAM and CPU. Just a reminder - the F-1 micro instances as part of the forever free tier are applicable only in selected US regions (us-east-1, us-west-1 and us-central-1 as to my knowledge), if you deploy these anywhere else, you will be charged.
As to other settings, you can allow traffic on ports 80 and 443 on this screen or you can do it later by adding firewall rules to this machine. For convenience, it is better to tick the Allow HTTP/HTTPS traffic options from this screen directly. Port 22 should also be allowed by default. After you're finished configuring the instance, accept the terms and click Deploy. The deployment might take a little while, this would depend on your selected datacenter, machine type, and so on.
Accessing the Virtual Machine
After the machine is successfully deployed, you should arrive on the following screen.
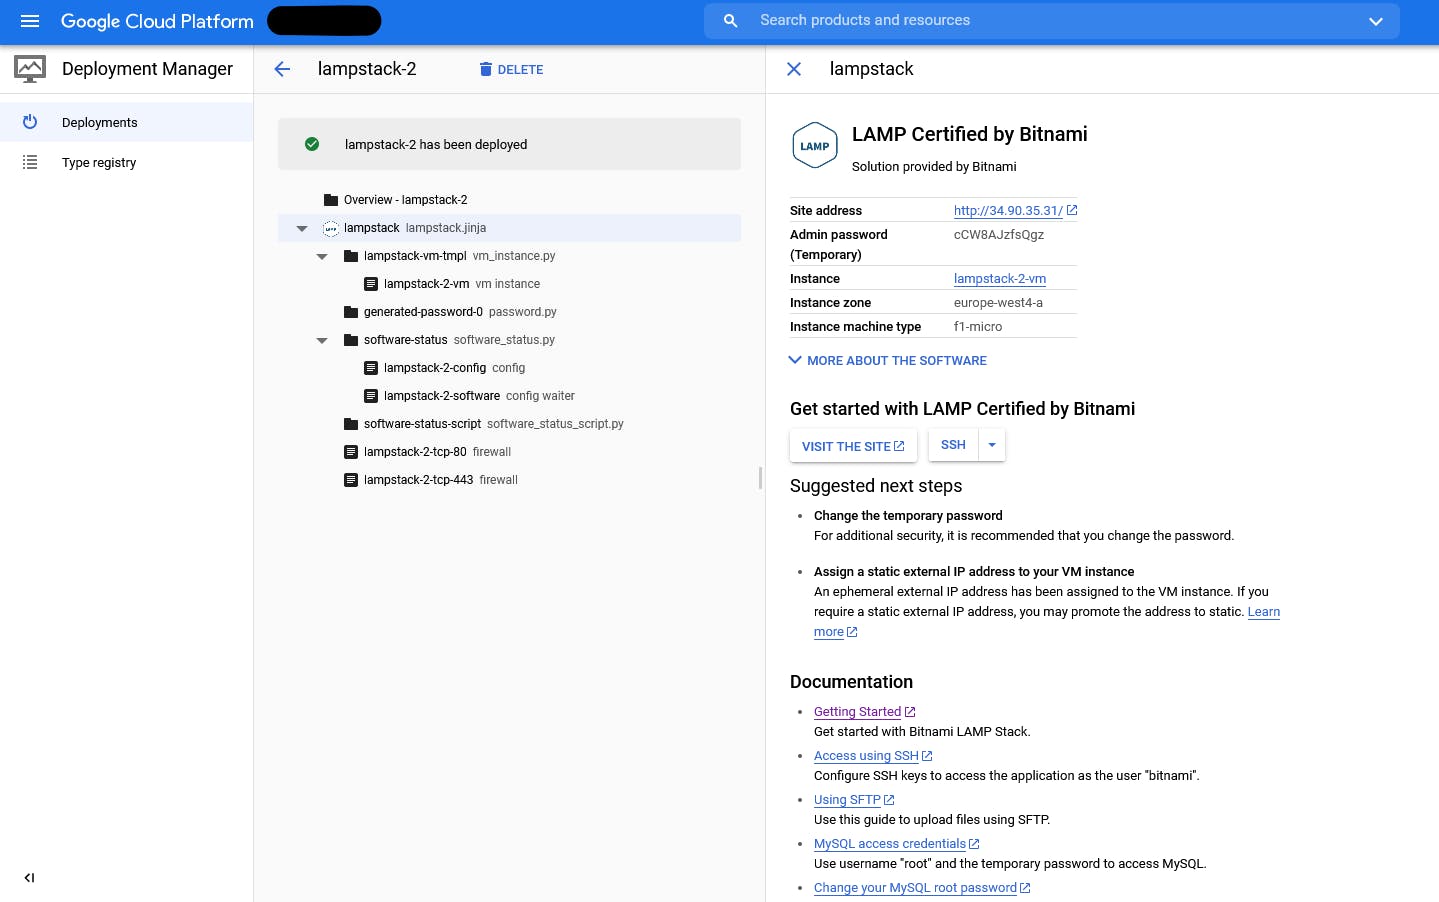
From here, you might want to take a note of the IP address and the admin password. Accessing the VM from here is simple, just click SSH underneath the basic machine information table, a new browser window should pop up and you should be connected to the VM via SSH. You can also connect to the VM via another SSH client like Termius or with gcloud CLI, instructions for these methods should be available in the attached documentation.
Setting up the VM
As we have all needed software like PHP, Apache 2, MariaDB (MySQL), Composer and Git already installed, we'll just need to set these up properly to get our application running. The only thing you might need is NodeJS/NPM as most of Laravel applications make use of NPM to install JavaScript packages like Laravel Mix. To install NodeJS fast and easy, we'll make use of nodesource. Bitnami LAMP currently runs Debian 10, thus we'll import a Debian NodeJS 16.x source and install it via apt.
sudo curl -fsSL https://deb.nodesource.com/setup_16.x | sudo bash -
sudo apt install -y nodejs
The Database
Let's set up a database first, we'll make use of the admin password we've been given. The following flow will create a database and a user for your application.
dominik_zarsky@lampstack-2-vm:/home/bitnami$ mysql -uroot -p
Enter password: <your_admin_password_here>
Welcome to the MariaDB monitor.  Commands end with ; or \g.
Your MariaDB connection id is 8
Server version: 10.3.29-MariaDB Source distribution
Copyright (c) 2000, 2018, Oracle, MariaDB Corporation Ab and others.
Type 'help;' or '\h' for help. Type '\c' to clear the current input statement.
MariaDB [(none)]> CREATE DATABASE laravel;
Query OK, 1 row affected (0.021 sec)
MariaDB [(none)]> CREATE USER 'laravel'@'localhost' IDENTIFIED BY 'test123';
Query OK, 0 rows affected (0.001 sec)
MariaDB [(none)]> GRANT ALL PRIVILEGES ON laravel.* TO 'laravel'@'localhost';
Query OK, 0 rows affected (0.015 sec)
MariaDB [(none)]> FLUSH PRIVILEGES;
Query OK, 0 rows affected (0.017 sec)
MariaDB [(none)]> exit;
Bye
The Application
For the purpose of this showcase, I'll clone the Laravel Boilerplate application from GitHub, as I presume you'd be installing your own the same way. If you're not using Git, you may want to use SCP to copy your application's files over to the VM (you'd need to download the machine's SSH keys for that, instructions for this could be found in this documentation).
Let's hop on over to /opt/bitnami which is the default directory for all preinstalled Bitnami software and files. It is customary to create a projects directory here, this will be the directory where all custom web applications would be placed. The following commands can be used as a general flow for setting up the whole application. If you encounter permissions problem, execute the following commands as sudo or change the permissions to the projects directory.
cd /opt/bitnami/
mkdir projects && cd projects
git clone https://github.com/rappasoft/laravel-boilerplate
cd laravel-boilerplace
cp .env.example .env
composer install
npm install
npm run prod
php artisan key generate
php artisan storage:link
sudo chown -R daemon:daemon /opt/bitnami/projects/laravel-boilerplate/storage
sudo chown -R daemon:daemon /opt/bitnami/projects/laravel-boilerplate/bootstrap
Now we'll need to update the .env file's database settings for the database we've created earlier.
....
# Database
DB_HOST=localhost
DB_PORT=3306
DB_DATABASE=laravel
DB_USERNAME=laravel
DB_PASSWORD=test123
....
Finally, we can migrate and seed the database.
php artisan migrate
php artisan db:seed
The Server
Now the application is all set up, the only thing that is left to be done is to set up the Apache 2 webserver itself. For that, we'll need to set up a new Virtual Host, we can achieve this by going to the Apache2 configuration directory and creating a new VHOST entry. Let's create a laravel-boilerplate-vhost.conf in /opt/bitnami/apache2/conf/vhosts directory. You might do this with Vim or nano. The vhost needs to be configured like this:
  <VirtualHost 127.0.0.1:80 _default_:80>
    ServerAlias *
    # ServerName yourdomain.com
    DocumentRoot /opt/bitnami/projects/laravel-boilerplate/public
    <Directory "/opt/bitnami/projects/laravel-boilerplate/public">
      Options -Indexes +FollowSymLinks -MultiViews
      AllowOverride All
      Require all granted
    </Directory>
  </VirtualHost>
To apply the changes, we'll restart the Apache 2 webserver by running sudo /opt/bitnami/ctlscript.sh restart apache.
It works
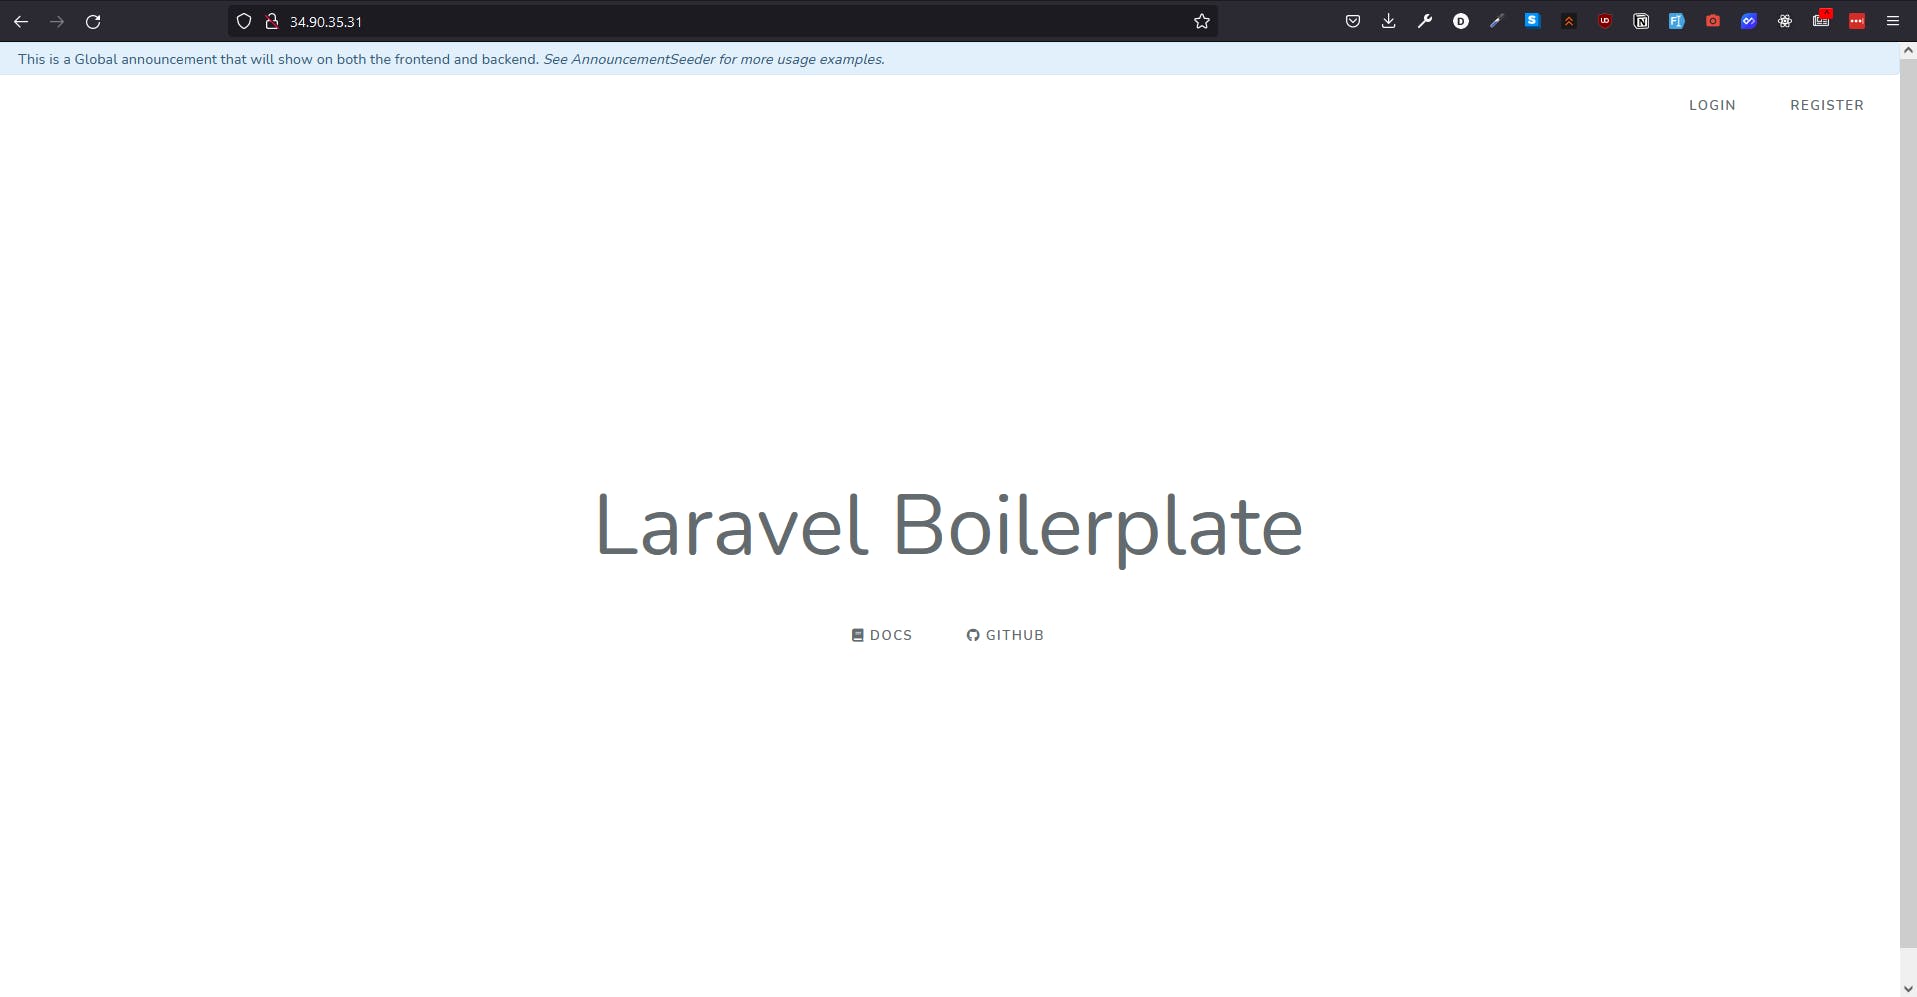
After restarting Apache 2, head over to the VM's IP, you should see your application up and running, just like the sample Laravel Boilerplate application shown below.
Next steps
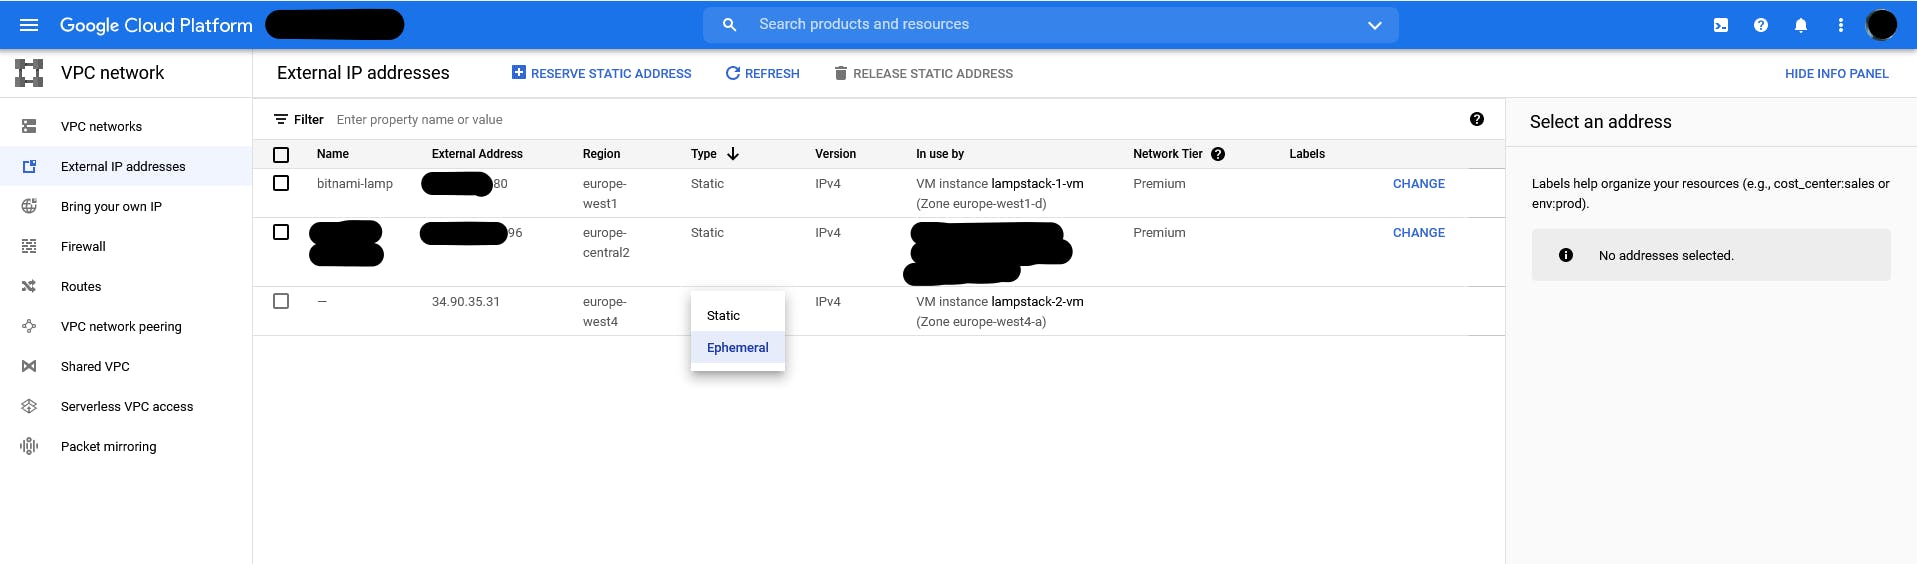
Up next, you might want to set up a static IP for your instance, you can do that from the VPC network section under Networking in the left-hand side menu. In that section, choose the External IP addresses tab. You should see the following screen, where you can change the IP type from ephemeral to static. That way, the IP won't change over time and you can happily assign a domain name to this machine.
If you'd like to get a free Let's Encrypt SSL certificate, the Bitnami LAMP image is equipped with the bncert tool which makes it easy to generate and configure an SSL certificate for your website. You can run the bncert tool with sudo /opt/bitnami/bncert-tool. You can learn more about it in Bitnami's documentation.
Wrapping up
In this article, I've summarized the use-cases for the Google Cloud Platform, then a way to spin up a Bitnami LAMP Virtual Machine instance on the GCP by using the Google Cloud Console was shown. After that, we've set the instance up to a state when we could deploy and publish a sample Laravel application on it, this included setting up a MySQL database, the application itself and an Apache 2 web server. I hope this article helped some of you with deploying your application to the GCP. If not, you may also want to check out the GCP VM Documentation and Bitnami documentation. Until next time...