Automate your Laravel app deployments with Azure DevOps

Deploying Laravel applications can be a tedious and time-consuming process, but with the use of continuous integration and continuous deployment (CI/CD) pipelines, the process can be automated. Azure DevOps is a popular choice for creating such pipelines, as it offers a wide range of tools for building, testing and deploying code. In this article, we will explore how to configure a build pipeline and release pipeline, and automate the deployment of a Laravel application using Azure DevOps.
About Azure DevOps
Azure DevOps Services is a cloud-based CI/CD and project management tool developed by Microsoft. It also has an on-premises alternative called Azure DevOps Server.
Most of the features of this tool are free to use for companies and individual developers (up to certain limits), including private git repositories, Boards for project management, Test cases, Artifact repositories (for storing npm, NuGet or Python packages) and Azure Pipelines to support your CI/CD processes.
In this article, we are going to be looking at Azure Pipelines via Azure DevOps Services.
Setting up the repository and the Build pipeline
For this article, I have created a starter MVC application with Laravel Breeze and React which will be hosted on GitHub (this is not a prerequisite as Azure DevOps has excellent support for other platforms such as GitLab or BitBucket as well).
For the build, a free Azure DevOps account is required. The free tier limits are described on the Pricing page. To summarize - the free tier includes:
1800 minutes per month for builds and releases running on the Microsoft-hosted agents for private projects (self-hosted agents have no limits, public projects have no limits on the Microsoft-hosted agents as well)
Unlimited private git repositories (we will not be using these)
2GB artifact storage (should be plenty as Laravel build artifacts do not consume much space anyway)
Azure Boards for project management
One parallel job (build or release) running
The account can be created here. If you already have an Azure subscription, you can use your Azure account as well.
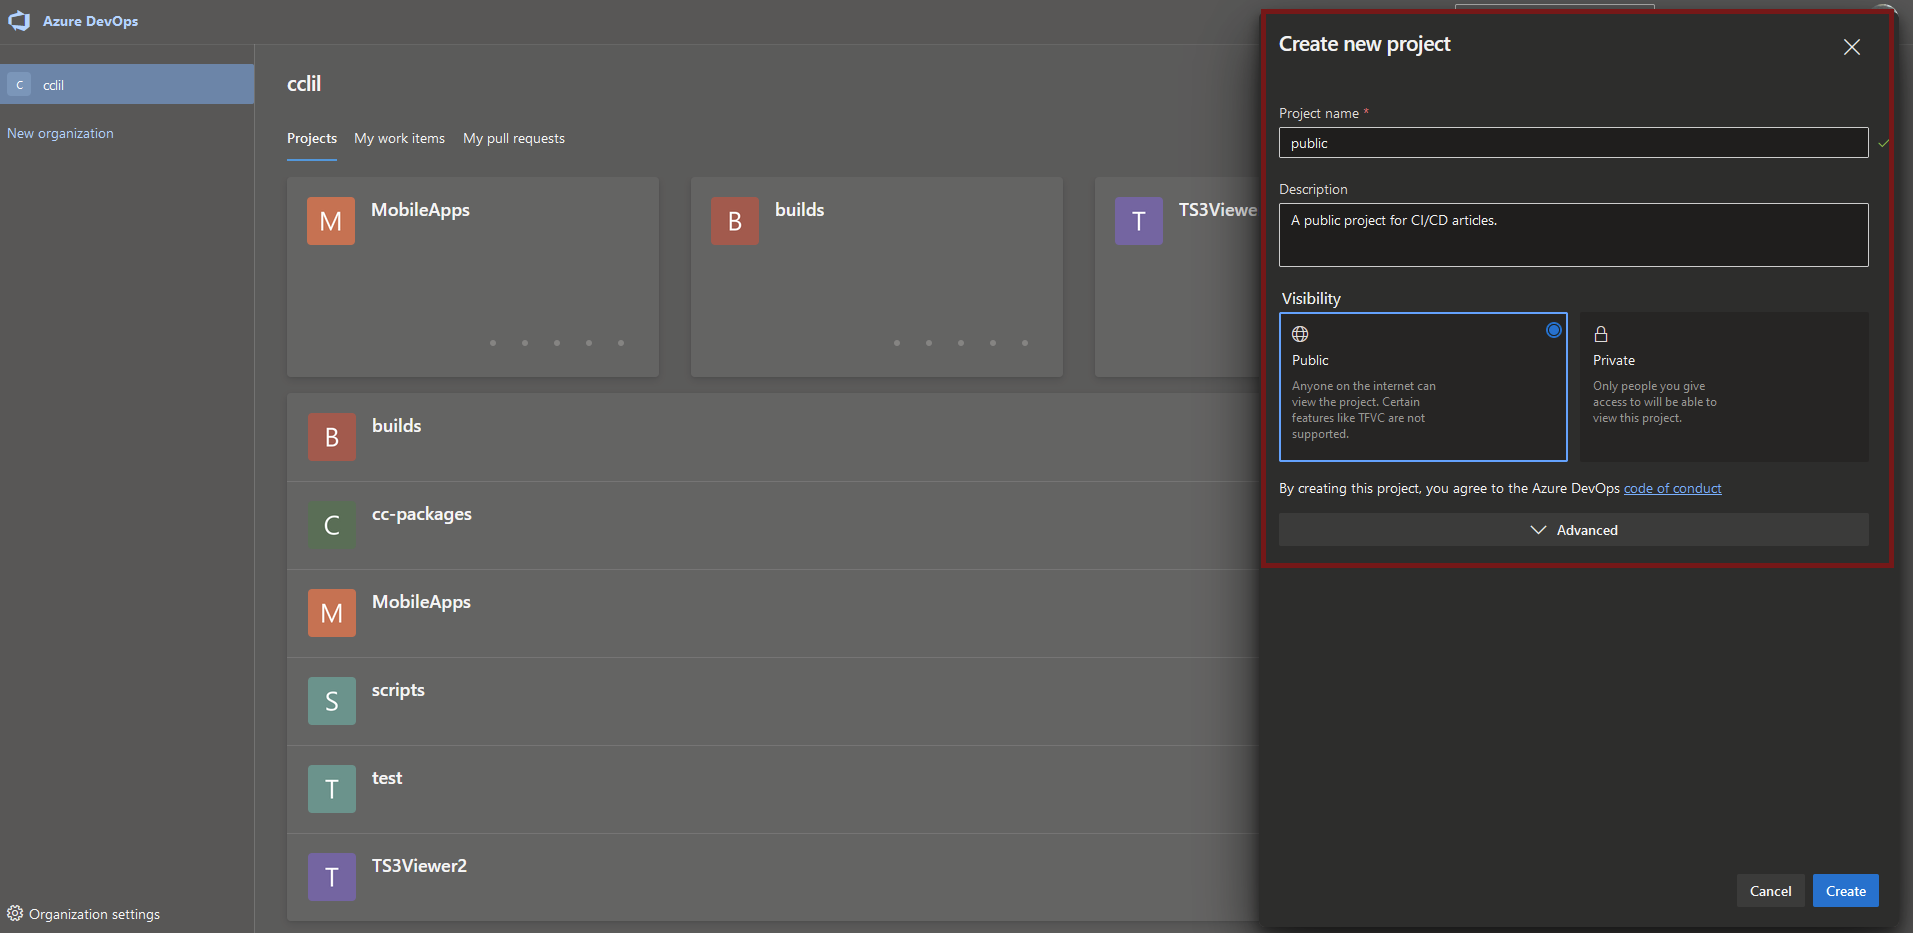
After the signup, create a project and connect your git repository. For this article, I will be using a public project which is publicly visible by default. This will make all the builds, artifacts and repositories in such projects also public. Use a private project if your pipelines are intended to be private.
To create a build pipeline, we first need to create a YAML file describing the build process. This file is usually called azure-pipelines.yaml and is stored in the root of the git repo. Other naming conventions (for example ci.yaml) and file locations can also be used. This file can be either created manually or via Azure DevOps. For me, configuring the pipeline via Azure DevOps is the preferred way as all the possible build tasks and their options are listed and can be used as helpers for building the pipeline. You can also use the Classic pipelines alternative which is a no-code solution to building your pipelines. I generally recommend having pipelines stored as code, thus I will not be covering Classic pipelines in this article.
The steps to create a new pipeline directly from Azure DevOps are as follows:
Go to your projects at https://dev.azure.com/your_organization
Select your project
In the left menu, go to Pipelines and select Pipelines from the submenu
Click Create Pipeline
Select the GitHub with YAML option
Select your repo (you might need to authenticate to GitHub and grant repo permissions)
In the Configure your pipeline section, select Starter pipeline
You should end up on the following screen:
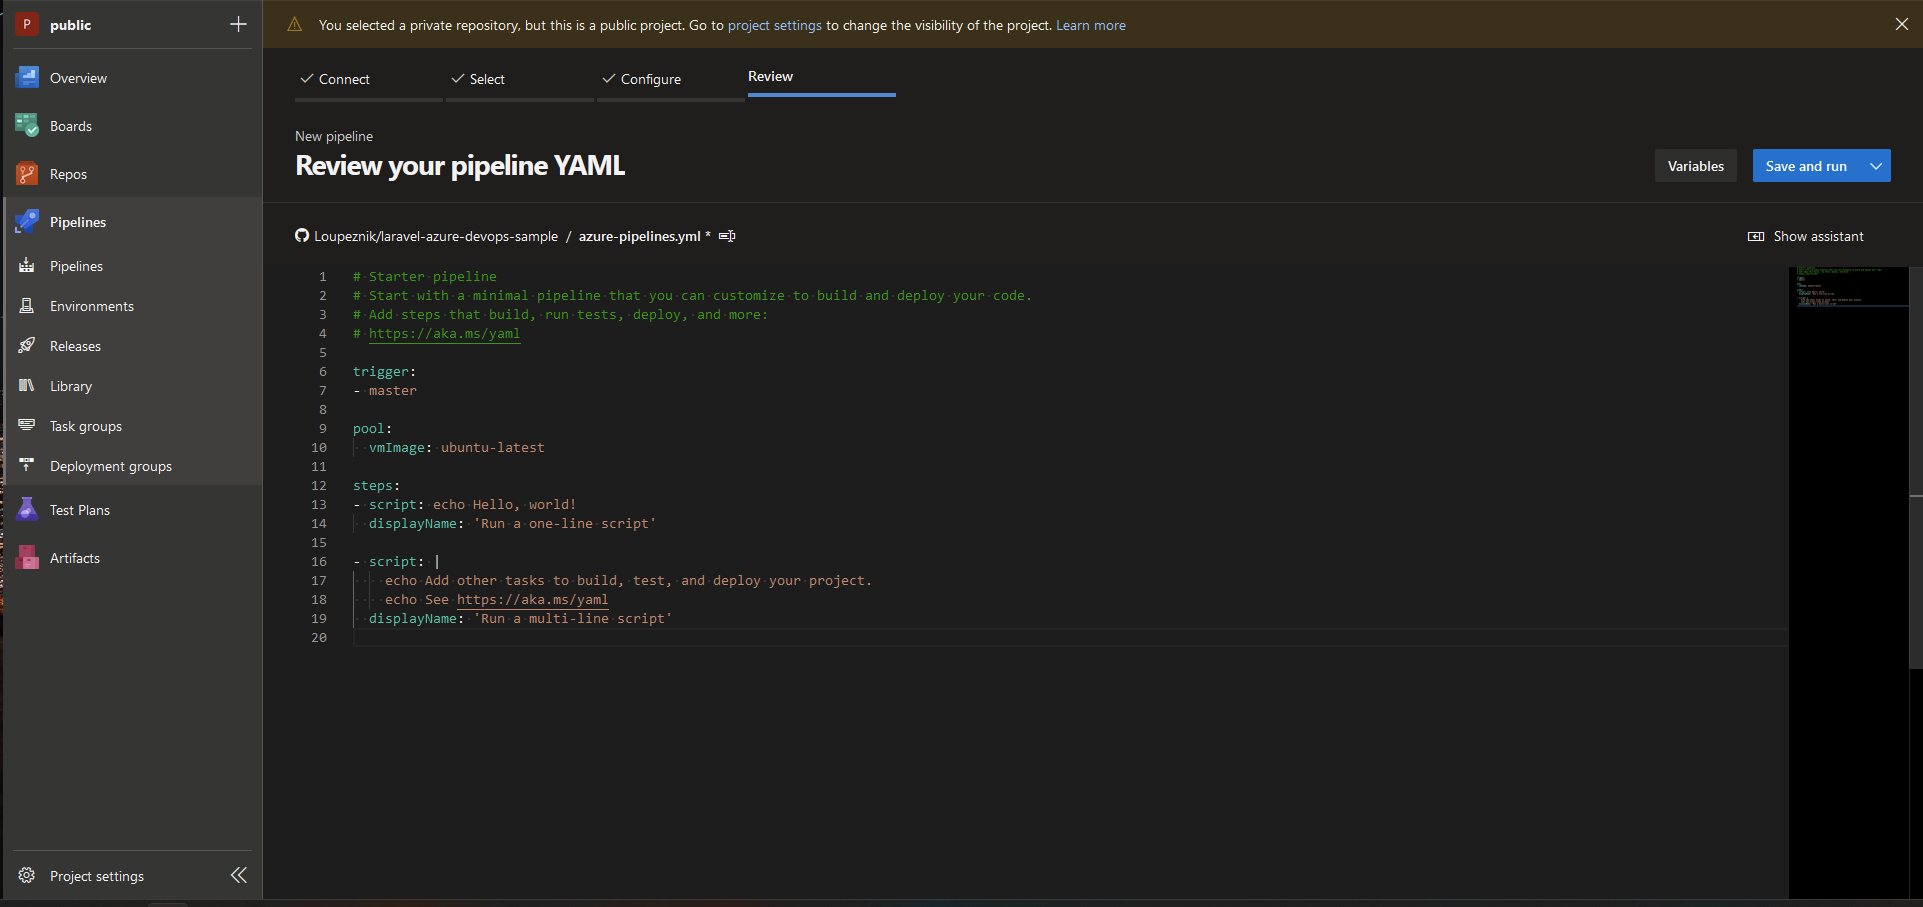
From this screen, you can start writing the pipeline. Azure Pipelines are well documented by Microsoft, you can check out the documentation here.
For now, let's focus on the steps needed to build the pipeline for our Laravel application. The final build pipeline looks as follows:
trigger:
- master

pool:
  vmImage: ubuntu-latest

variables:
  phpVersion: 8.1

steps:
- script: |
    sudo update-alternatives --set php /usr/bin/php$(phpVersion)
    sudo update-alternatives --set phar /usr/bin/phar$(phpVersion)
    sudo update-alternatives --set phpdbg /usr/bin/phpdbg$(phpVersion)
    sudo update-alternatives --set php-cgi /usr/bin/php-cgi$(phpVersion)
    sudo update-alternatives --set phar.phar /usr/bin/phar.phar$(phpVersion)
  displayName: 'Use PHP version $(phpVersion)'

- script: composer install --no-interaction --prefer-dist
  displayName: 'composer install'

- task: NodeTool@0
  inputs:
    versionSpec: '18.x'
  displayName: 'Install NodeJS'

- task: Npm@1
  inputs:
    command: 'install'
    workingDir: '$(Build.SourcesDirectory)'
  displayName: 'npm install'

- task: Npm@1
  inputs:
    command: 'custom'
    workingDir: '$(Build.SourcesDirectory)'
    customCommand: 'run build'
  displayName: 'npm build'

- task: CopyFiles@2
  inputs:
    SourceFolder: '$(Build.SourcesDirectory)'
    Contents: |
      **/**
      !**/node_modules/**
      !**/.git/**
      !**/storage/**
    TargetFolder: '$(Build.ArtifactStagingDirectory)'
    CleanTargetFolder: true
    OverWrite: true
  displayName: 'Copy files to publish directory'

- task: PublishBuildArtifacts@1
  inputs:
    PathtoPublish: '$(Build.ArtifactStagingDirectory)'
    ArtifactName: 'drop'
    publishLocation: 'Container'
    StoreAsTar: true
Let's dissect the pipeline a little:
The trigger determines a Continual Integration (CI) trigger on a branch of your project. If the branch is defined in the trigger array, the build will run every time code is pushed into the branch. It will also run build validation on pull requests
The pool determines an agent pool which will be used for the build. In this case, ubuntu-latest is used. You can also use Windows and MacOS agents. These agents are hosted by Microsoft and their use is counted towards the free build minutes included in the Azure DevOps Free Tier. You can also use self-hosted agents (these will be covered in the next section of this article)
As this is not a multi-stage build, steps, which describe the tasks the pipeline has to run, are defined directly in the base of the YAML file
The first couple of steps is to install dependencies - PHP, Composer and NodeJS. On Ubuntu agents, PHP and Composer are installed by default, we only have to select the version of PHP which we want to use. This is achieved by setting the version in the variables section and consequently using the
update-alternativescommand inside the first script taskWe then run
composer installto install dependencies. In this case, the application sits in the root of the git repo so we do not have to define a path for ComposerNodeJS is installed via the NodeTool@0 task, we can specify the version of Node we want to install
Node packages are installed and the JS bundle is built using the Npm@1 tasks. We need to define the command and path to files to each command (in this case we install and then run a custom build command for build). The path is by default
$(Build.SourcesDirectory)which represents the root of the pulled git repositoryAfter all dependencies are installed and the frontend bundle is built, we can copy the files to
$(Build.ArtifactStagingDirectory). We are excluding the node_modules, .git and storage directories as these are no longer neededFinally, we take the complete application files from the artifact staging directory, compress these into a tar archive and publish them. This will upload the tar to Azure Pipelines storage for later use in Release pipelines
If you need to add more tasks, the Assistant which can be found in the top right corner of the editor is very useful as it contains a list of usable tasks, you can also define the task values in a UI which will then be transformed into YAML representation.
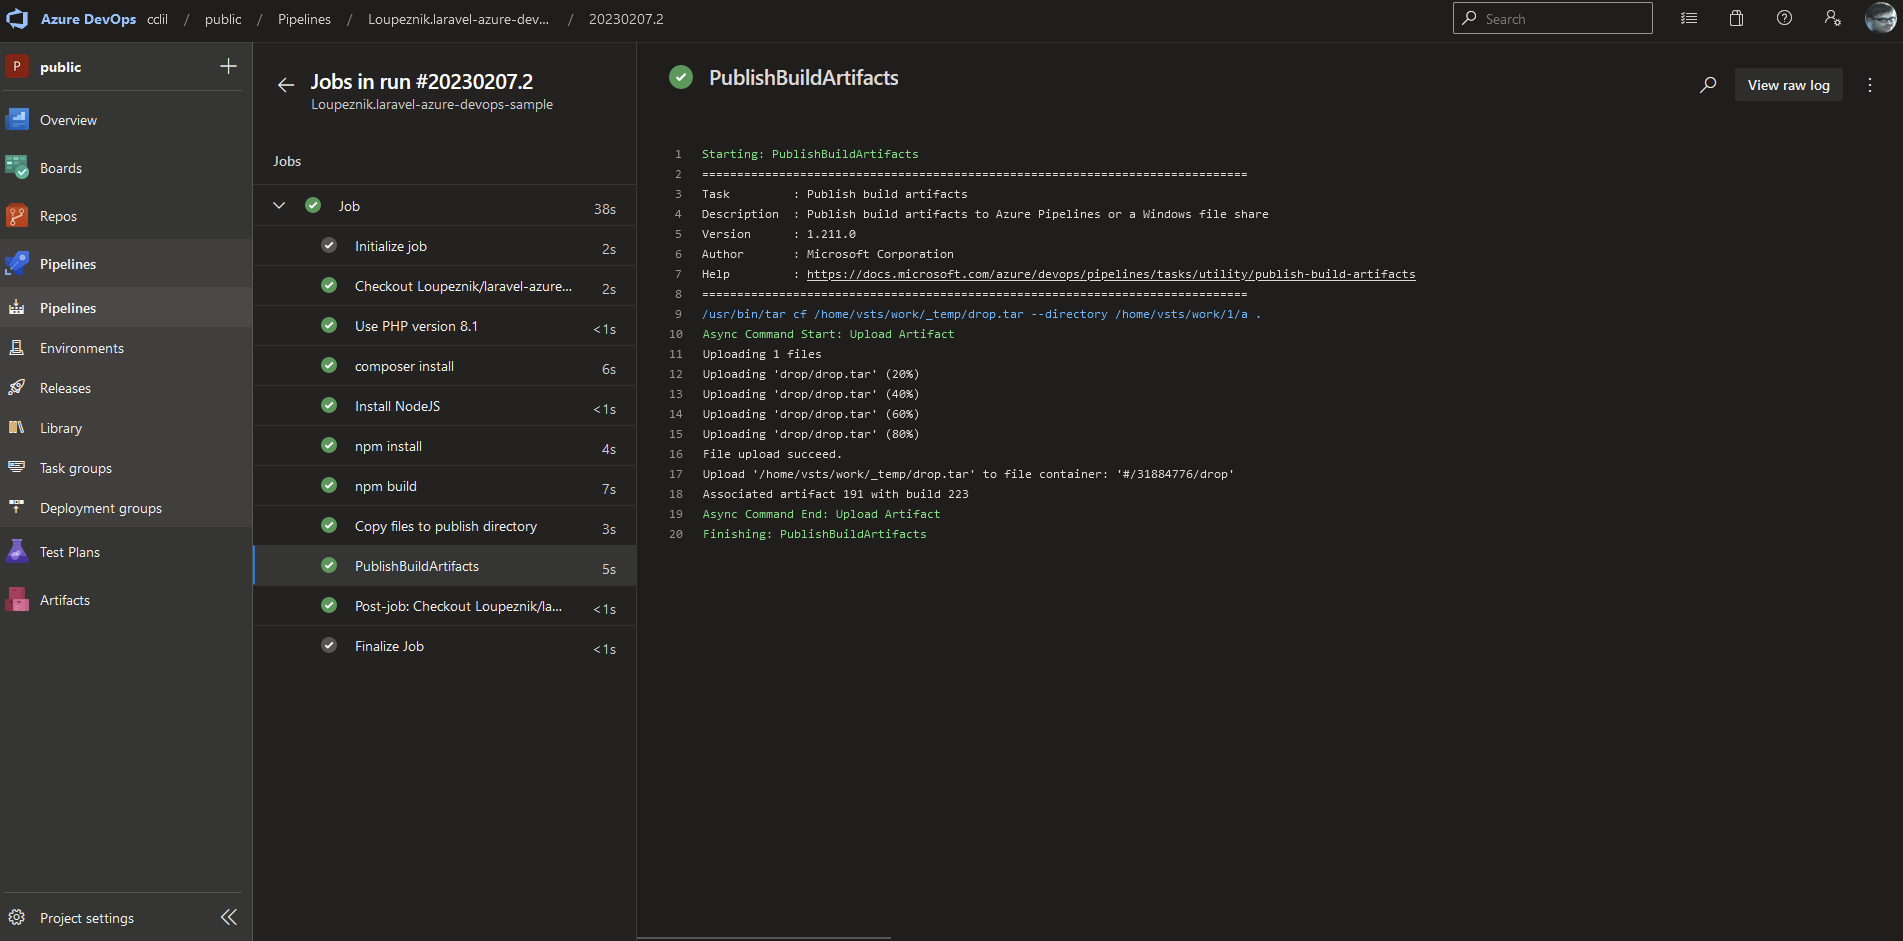
After completing your pipeline, click Save and run button in the top right corner above the editor, this will commit the pipeline to your repo and run the pipeline. Ideally, it would complete on the first try, if not, open the build and search the task logs for errors. The pipeline logs should look like this:
Setting up the deployment
The deployment can be a little trickier depending on where your application is published. If you use shared hosting, Azure AppService or a similar service, the deployment would be pretty straightforward as you would only need to download the artifact and upload it via FTP or AzureRM to your destination.
For 'enterprise' use or for people who host applications on their own servers, this is where the fun begins. One of the best features of Azure DevOps CI/CD pipelines is the option to use self-hosted agents (or private agents as they are sometimes called).
This means that an agent (or multiple agents) which is used for the deployment is running directly on the application server. This has several advantages:
The communication is done in such a way that the self-hosted agent on your server communicates to Azure DevOps via an API. Therefore, in many cases it eliminates the need to have multiple ports open on the application server's firewall to be able to deploy your application there from a remote CI/CD server, thus eliminating possible attack vectors on your infrastructure
You also do not need to store credentials or SSH keys anywhere in the CI/CD tool as the agent runs directly on the machine as a regular user
The deployments via the Private agent also tend to be faster than deploying via SFTP/WinRM/Robocopy or other tools
These agents can be used free of charge (with no monthly limits on usage minutes or number of agents)
The release pipeline
Unlike the build pipelines, the release pipelines do not use YAML but rather a visual editor just like Classic pipelines. You can find release pipelines under Releases in the Pipelines submenu. From there you can create a New pipeline.

After creating the pipeline, you can Add an artifact, where you can select the desired artifact. For the source pipeline, choose the pipeline you've just build from the dropdown and set the source alias (this will be the alias which you'll use to reference the build artifact), for example, _build. After that, we'll need to define one or multiple release stages. These would normally be DEV, STAGING, UAT, PROD, etc. Stages then contain deployment tasks.
You can also use the YAML pipelines to deploy your application. This feature made it from preview to stable a few years ago but in my opinion, it is not as polished as the current Classic Releases (there are some caveats to managing your deployments this way). You can check out the YAML deployments documentation [here](https://learn.microsoft.com/en-us/azure/devops/pipelines/process/deployment-jobs?view=azure-devops) if you are interested.
Using self-hosted agent
As stated before, for deploying to your own server, the recommended way is to use a self-hosted agent. This agent can be run in a Docker container or directly on the target system as a regular user. The agent can make use of utilities installed on the system which is helpful for the deployment.
The pipeline for self-hosted applications looks as follows:

A pseudo-representation in YAML would look like this:
steps:
- script: 'php artisan down'
  workingDirectory: '$(DeployDirectory)'
  displayName: 'Take app offline'
  continueOnError: true
- script: '[ ! -d "$(DeployTempDirectory)" ] && mkdir -p $(DeployTempDirectory); tar -xf $(System.DefaultWorkingDirectory)/_build/drop/drop.tar -C $(DeployTempDirectory)'
  workingDirectory: '$(DeployDirectory)'
  displayName: 'Extract artifact to temporary directory'
- task: CopyFiles@2
  displayName: 'Deploy application'
  inputs:
    SourceFolder: '$(DeployTempDirectory)'
    TargetFolder: '$(DeployDirectory)'
    OverWrite: true
- script: 'php artisan migrate --force'
  workingDirectory: '$(DeployDirectory)'
  displayName: 'Run migrations'
- script: 'php artisan up'
  workingDirectory: '$(DeployDirectory)'
  displayName: 'Start the application'
The pipeline also uses variables which are defined in the Variables section of the release. For each stage, a $(DeployDirectory) variable is defined as the path to the application deploy directory on the target system.
To install a self-hosted agent:
Go to Project Settings > Agent Pools in your DevOps project
Create a new Agent Pool
Click New Agent in the top right corner of the window
Follow the instructions on the screen
You can also install the agent as a Docker container, refer to [this repo](https://github.com/Loupeznik/utils/tree/master/az-devops-agent) for more.
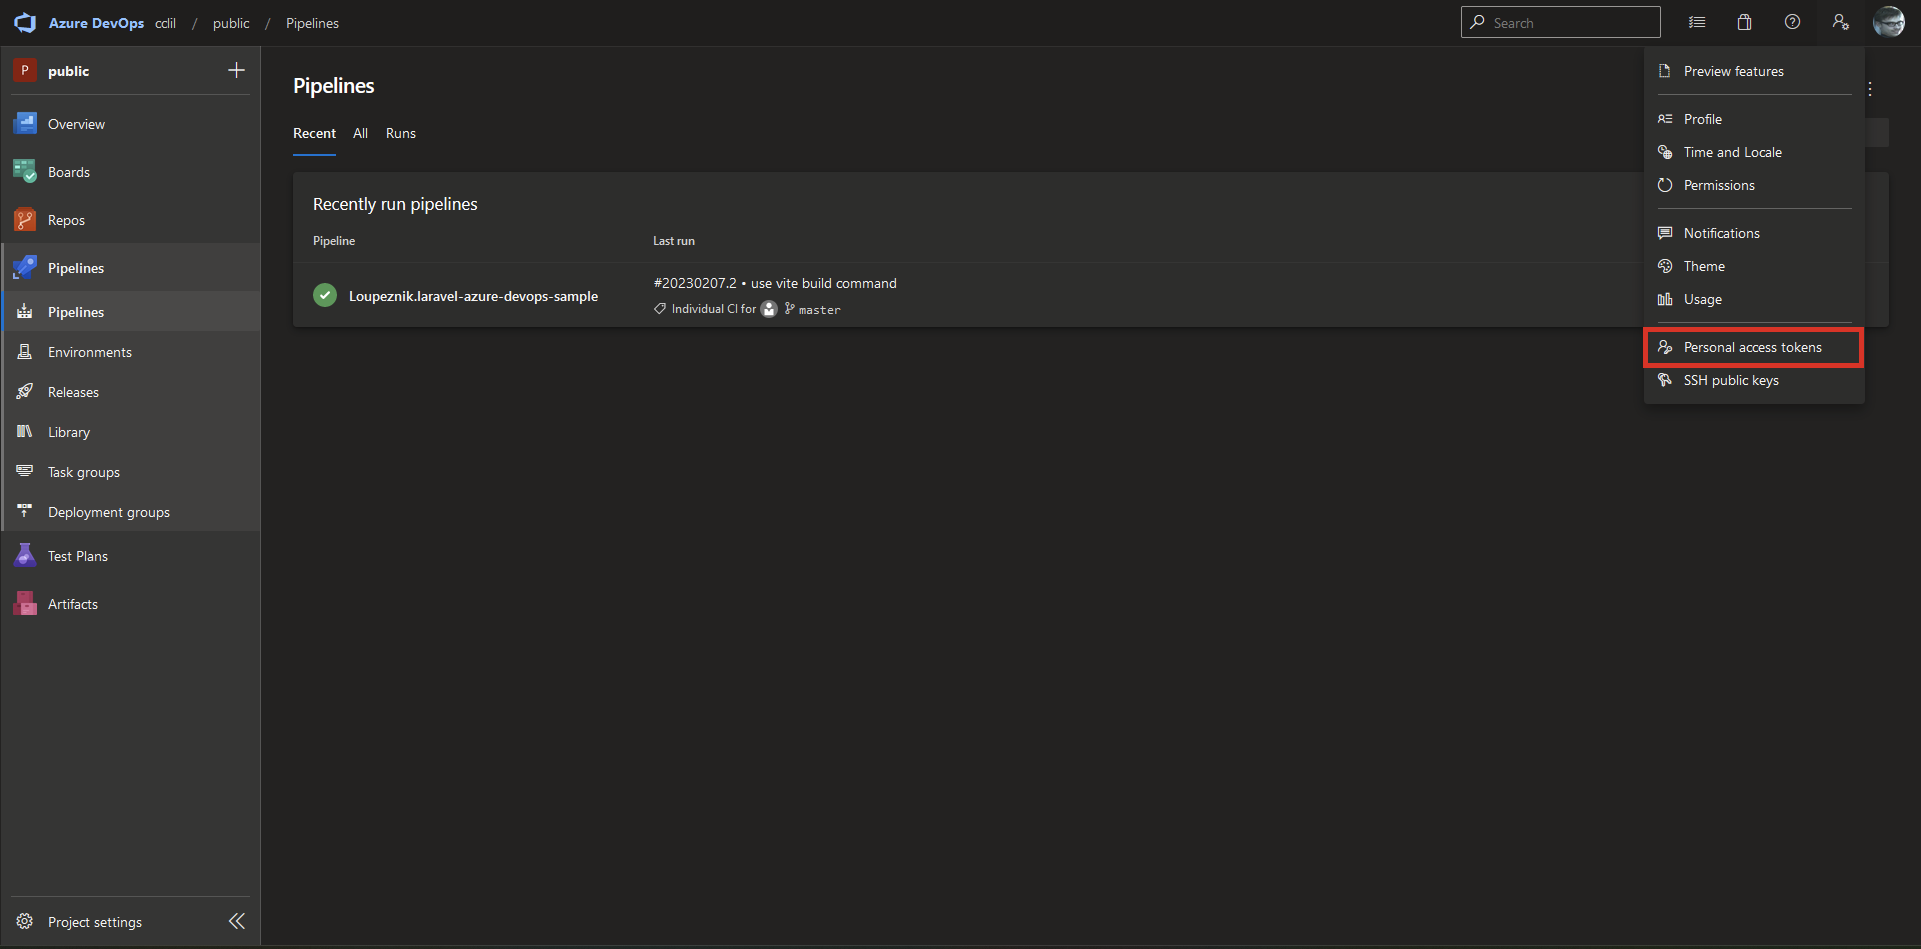
For PAT authentication, you will also need to generate a Personal Access Token, this can be done from the settings menu. The PAT needs to have permission to Read and manage Agent Pools, otherwise, it will not be able to register itself to the created agent pool.
You can also run the agent as a service, for Linux hosts, you would run these commands from the agent's install directory:
sudo ./svc.sh install $USER
sudo ./svc.sh start
After the agent is installed and running, you can begin using it in your pipelines. The agent can be selected from the Job settings inside a release.

Note that there might be additional configuration needed on the server for the deployments to be successful. You may have to add a .env file and change permissions on the deploy folder. An example of this would be the following:
export TARGET_DIR=/var/www/your_project

sudo chown -R $USER:www-data $TARGET_DIR
sudo find $TARGET_DIR -type f -exec chmod 644 {} \;
sudo find $TARGET_DIR -type d -exec chmod 755 {} \;

cd $TARGET_DIR

sudo chgrp -R www-data storage bootstrap/cache
sudo chmod -R ug+rwx storage bootstrap/cache

touch $TARGET_DIR/.env
# fill your .env file
Using Microsoft-hosted agent
If you are deploying to a managed hosting service via FTP or you need to deploy via SCP/SFTP to the target server, you can use Microsoft-hosted agents. Using these in the release pipelines also counts towards the monthly build-minutes limit.
If your application is hosted in Azure AppService, there are dedicated tasks for example the Azure App Service deploy task which uses a service connection to Azure to deploy your application to the AppService.
In any case, the pipeline would then have only one task, which would probably be the FTP Upload or the App Service deploy task. In case of deploying to managed hosting service via FTP, it would look something like this:

Note that in the aforementioned case, you would also need to set up the $(Password) secret variable.
Conclusion
In this article, I went through the steps to set up CI/CD pipelines for a Laravel application in Azure DevOps. The advantages and possible disadvantages of Azure DevOps as a CI/CD and project management tool were clarified.
For reference, you can find the complete Azure DevOps project [here](https://dev.azure.com/cclil/public), and the repo is located [here](https://github.com/Loupeznik/laravel-azure-devops-sample).
Thanks for reading...